I am privileged to conduct two stamping classes at our local community center every month. Today I’m happy to share the sweet and simple birthday card we made in our last class. It features one of the new colors brought in with the color refresh in the new 2023-2024 Annual Catalog: Lemon Lolly.

This is a quick and easy card that’s sure to get a smile from your lucky recipient.
Basics:
- Card Base: Lemon Lolly card stock, 8-1/2″ x 4-1/4″, scored at 5-1/2″ and burnished (rubbed firmly) with a Bone Folder
- Layer: Lemon Lolly card stock, 5-1/4″ x 4″
- Embossing Folder: Countryside Blossom
- Greeting: Basic White 3″ x 3″ scrap, punched out using the 2-3/8″ Circle Punch
- Stamp Sets for Greeting: Playing in the Rain (flowers) and Circle Sayings
- Backing for Greeting circle: Parakeet Party card stock: 1″ x 3″: Lovely Labels Pick-a-Punch
 |  | |
 | ||
 |  Circle Punch") | |
 |  |  |
 |  |

")
")


Tips:
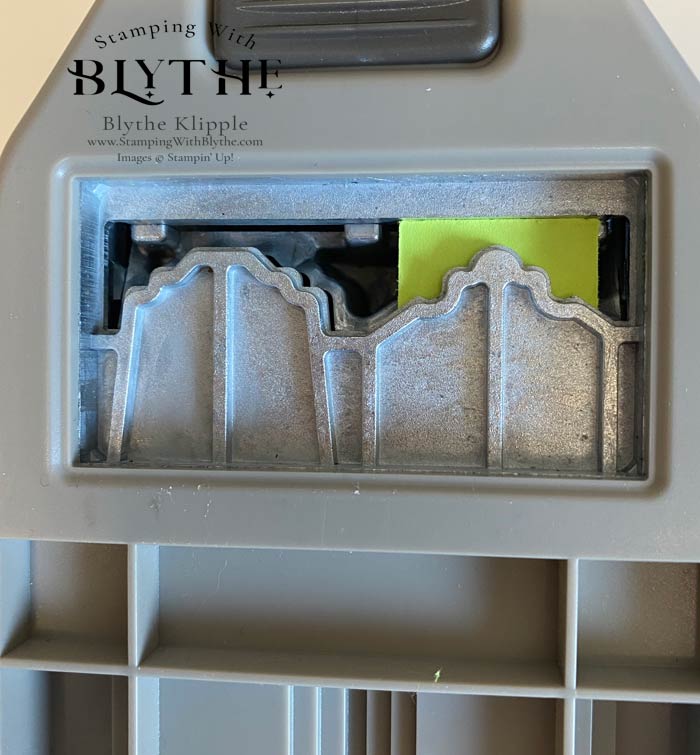
- Punch: Insert Parakeet Party card stock into punch. Turn punch over and ensure that the end of the card stock is flat against the end of the punch. Trust me and take this little extra step. If it’s at an angle you won’t be happy with the punched image! Repeat with other end of label strip. Cut punched piece in half.
- Attach the punched strip to the back side of the stamped Basic White circle using adhesive of your choice (my choice would be Multipurpose Liquid Glue which allows you some ‘wiggle room’), as shown in the image at the top of this page. Attach finished piece to the card front using Dimensionals.


You could recreate this simple card using any color of card stock, any embossing folder, any image and any greeting. Bing. Bang. Boom. Please visit my Stampin’ Up! store if you need any of the “ingredients” used in today’s card or if you need stampin’ supplies in general. And please, if you have questions or ‘confusions’ relating to today’s card or any project I post, please comment below and I’ll get back to you a.s.a.p.