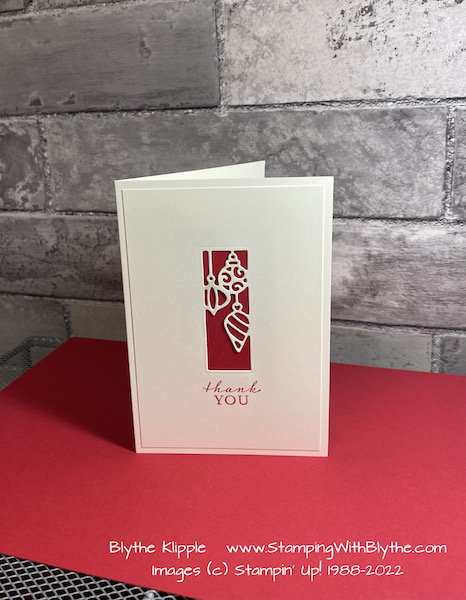
Today’s card is very simple and quick to make. Consider making 4-6 and gift them as a hostess gift or for your own use.

Product List
|
|
|||
|
|
|
|
TIPS:
- Basic White card stock: 3-1/8″ x 4-5/8″
- Position the Ornaments Die in the center of this card stock piece, about 1″ from the top
- After attaching contrasting card stock layer (next line), attach layer to card front (second next line).
- Real Red card stock: 1-1/2″ x 3″
- After die cutting the ornaments images, on the back side of the card layer, attach the Real Red card stock using either Multipurpose Adhesive or Stampin’ Seal.
- Attach this layer to the front of the Note Card.
- Using Real Red Classic Ink, stamp the greeting of your choice (I used ‘thank you’)
- Done!

For such a simple card I think it’s quite pleasing and definitely worth making a bunch of. You could change it out a bit by swapping out the color of the card stock layer behind the dies. And then also change the ink color if you want.
Click on any of the product images above to be taken directly to my Stampin’ Up! Store so you can add the desired item/s to your collection.
December 6th, 2021: FREE SHIPPING from Stampin’ Up! on all orders over $50. Time to stock up on whatever it is you’ve been needing (for me that’s some basics like envelopes and packaging supplies) or wanting.

* Shop Stampin’ Up! in Blythe’s Store * Like my Facebook Page * Follow me on Pinterest * Join Paper Pumpkin and play along * Shop Stampin’ Up!’s Clearance Rack and save up to 60% * Join My Country Loft Team


