I just love this new Garden Greenhouse photopolymer stamp set and its accompanying Greenhouse dies. This is the first card I imagined and then made using this bundle:

The basic supplies are in this one stamp set and coordinating dies.
|
|
|
I used three basic colors plus white:
|
|
Clear blocks for the images:
|
|
|
|
And a very few accessories:
|
|
|
|
Measurements (from the base card front layer on up):
- Card front: 8-1/2″ x 5-1/2″, scored at 4-1/4″
- Next layer: 5-1/4″ x 4″ (Basic White)
- Next layer: 4-1/4″ x 3-1/2″ (Polished Pink)
- Next layer: 4″ x 2-1/4″ (Basic White)
- Next layer: 3″ square scrap (Vellum card stock) – die cut the greenhouse outline image
- Final layer: 3″ square scrap (Basic White) –
- Scraps for flowers and branch (Polished Pink, Daffodil Delight, Garden Green)
- Basic White scrap for greeting, approximately 1/2″ x 1-3/4″
The easiest instructions are to just LOOK at each layer and attach one to the next to the next.
- The first Basic White layer is run through the Stampin’ Cut & Emboss machine using the Brick & Mortar 3-D Embossing Folder. Attach to card front.
- Stamp the greenery image on the second (and smaller) Basic White layer. I used Garden Green Classic Ink to match the card front card stock.. Attach it to the previous later.
- Die cut solid greenhouse from Vellum card stock.
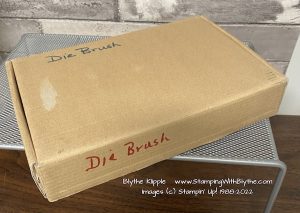
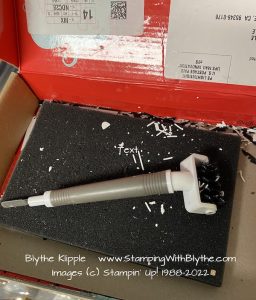
- Die cut greenhouse structure from Basic White card stock. Have fun poking out all of those little pieces. I use the Take Your Pick Die Brush Tip and a foam mat that’s placed inside an empty Paper Pumpkin box.
Take Your Pick Tools:
|
|
|


- Attach the previous two layers carefully using Liquid Glue. Attach these layers over the stamped image.
- Die cut two flowers and the branch and attach them to the greenhouse.
- Stamp greeting on scrap and attach to greenhouse, tucking the end under a leaf. All done.
Tomorrow I’ll show you how I adapted this beautiful card for my stampers at our semi-monthly community center stamping class.
Will you be placing a stamping order today? Wouldn’t you like to have the Garden Greenhouse elements to create some beautiful cards at your own home? If yes, and if you don’t already have a Stampin’ Up! demonstrator with whom you work/play, please consider shopping in my Stampin’ Up! Store. Clicking on any of the product images above will also take you directly to my online store. Thank you so much for supporting this small business owner! And please reach out to me if you have ANY questions about placing an order or re-creating today’s card.
By the way, do you need a current 20-21 Stampin’ Up! Catalog*? A relatively recent Mini Catalog* that runs from January through June 2022? Or a Sale-a-Bration brochure* which is valid until the end of February? Pssst….when you order from any catalog, you can choose FREE items from the Sale-a-Bration brochure for each $50 or $100 you spend. (No, that doesn’t include tax or shipping $$s.) Send me your mailing address in an email (blythe@stampingwithblythe.com) or text (not in the comments below) and I’ll mail the one/s you’re interested in right away. By the way, you can download PDFs for each of the three publications above via my Stampin’ Up! Website here.
* Shop Stampin’ Up! in Blythe’s Store * Like my Facebook Page * Follow me on Pinterest * Join Paper Pumpkinand play along * Shop Stampin’ Up!’s Clearance Rack and save up to 60% * Join My Country Loft Team


