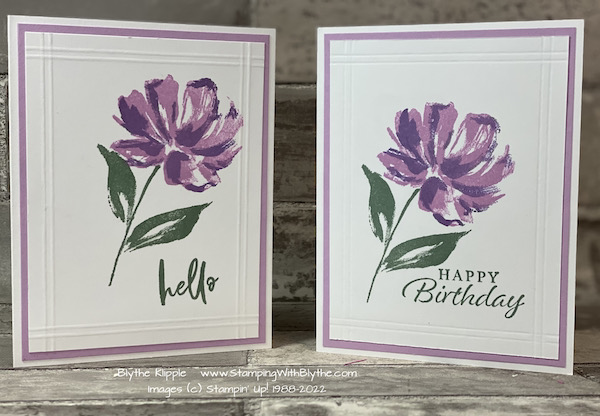
Today’s cards are one sample of the card “my” stampers made at our local Community Center last Thursday. It’s really quite simple and doesn’t require a lot of supplies.

Product List
|
|
|
||
|
|
|
|
Stamping Tips:
- Card Front: Basic White Thick card stock: 8-1/2″ x 5-1/2″, scored at 4-1/4″, folded away from the ‘depressed’ score line, and burnished (rubbed firmly) with a Bone Folder.
- Layer 1: Fresh Freesia card stock: 5-1/4″ x 4″
- Layer 2: Basic White card stock: 5″ x 3-3/4″
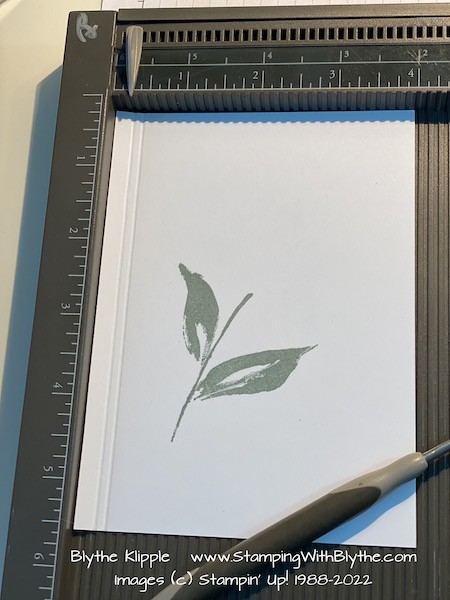
- Step 1: Stamp leaf stem using Soft Succulent Classic Ink on lower left of Basic White layer.

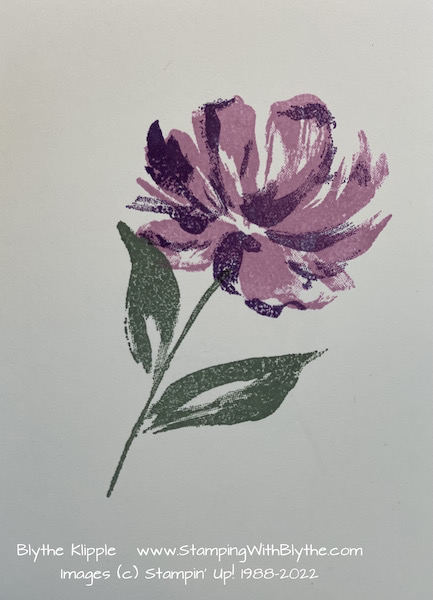
- Step 2: Stamp more solid flower using Fresh Freesia being sure to position the little ‘divet’ in the flower at the tip of the stem.

- Step 3: Stamp the accent-like layer of the flower using Highland Heather Classic Ink over the Fresh Freesia layer taking your time to match, as best you can, the petals and ‘divet’. If you don’t get it ‘perfect’ definitely don’t worry–it’ll still look great.

- Step 4: Using Soft Succulent Classic Ink, stamp your greeting in the lower right corner.
-
- Step 5: Turn the stamped layer to the back side and tuck it onto the upper left corner of the Simply Scored Board. Using the small tip end of the stylus, carefully score lines at the 1/4″ and 3/8″ marks along one side of the layer. Rotate to the next side, tuck into corner and repeat. Your finished score lines will be popped up on the right side of the layer.
- Attach the 2 layers to the card front using Multipurpose Glue.

- DONE!
- Optional: add a few jewels to the card front as desired.
Isn’t this just a lovely card? I love the simplicity and beauty. I must admit that I stamped the initial stems for my samples a little too far to the right. Suggestion: scooch the stem 1/4″ – 3/8″ more to the left which allows more space for your greeting. You can see in the images way up at the top of this page just how I scooted the stem over a bit more for the Birthday card.
If you need supplies for duplicating today’s cards, click on any of the supply items above and you’ll fly right to my Online Stampin’ Up! store. Please select me as your demonstrator and order away. 🙂 This month’s host code is J7ZTQ63B. At the end of month I’ll send you a thank you gift for shopping with me.
Back to the greetings, which one appeals to you or suits your needs the most? Don’t forget that birthday card at the top of the post.
Happy stamping to you! Please feel free to email, or text, me at any time with any questions you may have about our Stampin’ Up! products. I’m always happy to help in any way I can. I do my best to post regularly on my BLOG and would love to have you subscribe ~ StampingWithBlythe.com. (the caps aren’t necessary–they just make it easier to read)
* Shop Stampin’ Up! in Blythe’s Store * Like my Facebook Page * Follow me on Pinterest * Join Paper Pumpkin and play along * Join My Country Loft Team


