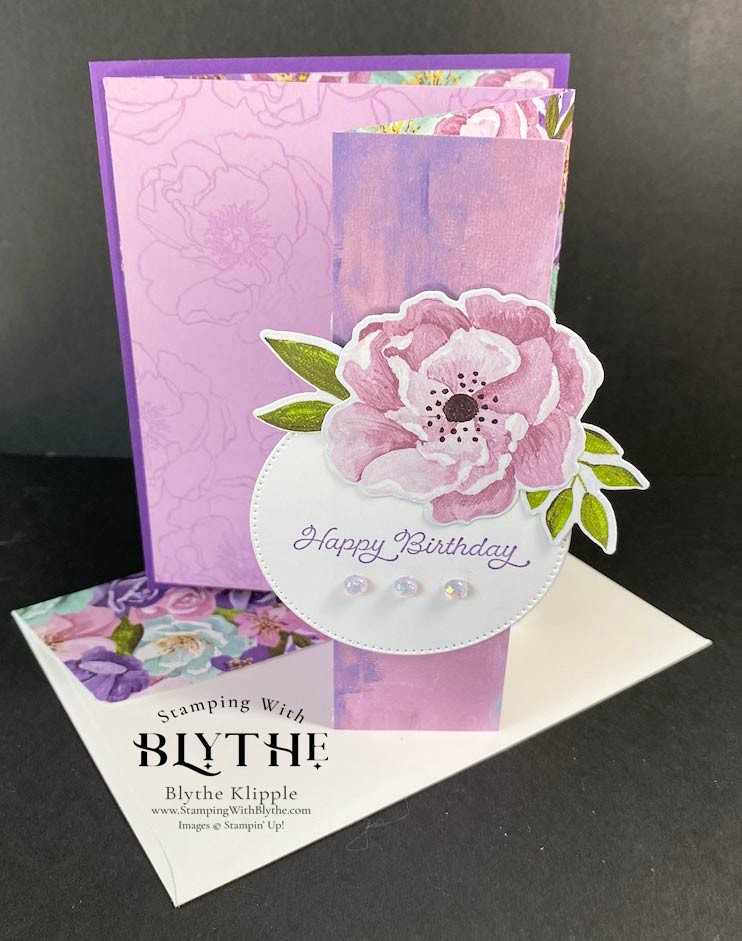
This beautiful Fun Fold Card using Stampin’ Up’s Designer Series Paper would make a perfect birthday card for a special someone. Actually, I made this card for a good friend’s mother and he was kind of knocked off his feet when he saw the finished project. It’s the first time I’ve made such a card but it certainly won’t be the last. Change up the designer series paper and you can have an entirely different mood of a card.

By following a few simple steps, you too can create a fun card like this one. Here’s what you’ll need to recreate this fun fold card:
Supplies for your card:
Product ListPrepping your Pieces/Layers
- Gorgeous Grape card stock: 4-1/4″ x 5-1/2″ (card base); 2-7/8″ x 3-7/8″ (inside greeting layer)
- Designer Series (printed) paper: 3 pieces: abstract or solid pattern: 1″ x 5-1/2″; flower pattern: 5-1/4″ x 12″, scored at 1″, 4″, 8″; flower scrap for die cutting; several leaves for die cutting
- Basic White card stock: 2-3/4″ x 3-3/4″ (inside greeting); scrap for card front greeting
- Fresh Freesia card stock: 3-7/8″ x 5-1/4″
Now Let’s Put it Together

- Fold the scored Designer Series Paper (DSP) into mountains and valleys according to the photos and attach it to the Gorgeous Grape 4-1/4″ x 5-1/2″ layer.
- Stamp the flower image all over the Fresh Freesia layer using VersaMark ink
- Die cut 2 flowers (different colors perhaps) from the DSP using the appropriate dies
- Die cut 3 leaves (clusters of leaves) from the DSP with dies as well
- Use Basic White scrap to cut out a 2-1/2″ circle using the Stylish Shapes Dies
- Adhere (glue) the 1″ x 5-1/4″ abstract/solid DSP piece to the 1″ panel
- Attach the stamped Fresh Freesia piece to the panel behind the 1″ panel with adhesive *
- Stamp greeting on Basic White 2-3/4″ x 3-3/4″ piece using Gorgeous Grape ink and attach it to the 2-7/8″ x 3-7/8″ Gorgeous Grape piece
- Attach one cut out flower and one leaf to the inside of the card greeting layer in the lower right corner
- Stamp card front greeting on Basic White circle using Gorgeous Grape ink
- Add second flower and two leaves to this circle with adhesive
- Add a strip of adhesive to the back of the stamped and decorated Basic White circle where it will attach to the 1″ panel
- Add pearls for that lovely little pop of bling!

*Check out the image below so you can see where that stamped Fresh Freesia layer of card stock attaches to the card. It’s kind of hard to describe with all those zig zagged folds.

How did I do that envelope flap? Cut a piece of DSP to 6″ x 2-3/8″. Attach it to the outside flap of the envelope using Multipurpose Glue, aka ‘green glue’. Be gentle with the spreading of the glue–just light “squiggles” around the outside edges and in the middle will be sufficient. No big wide goopy flows of the glue–that’s really overkill and can ‘warp’ your paper. Gently lay the DSP over the flap (open the envelope and lay the flap flat on your work space). Trim the excess with Paper Snips, aka scissors. TIP: I really like Stampin’ Up!’s Paper Snips because they are so sharp (beware!) and precise.
Thank you for joining me today. If you have any questions or comments relating to this card, please ask or leave your comment/s below!


