I promised myself that I would ‘play’ with new products from the 2016 Occasions catalog this past week. I had fun! I started with the Party Wishes stamp set. As I worked my way through my card I ended up using lots of new products.
My goal was to make some January birthday cards, including one for an eleven year old French boy. This card took on a life of its own. As I said, I wanted to use the Party Wishes stamp set as well as the new Party Pop-Up Thinlits Dies.
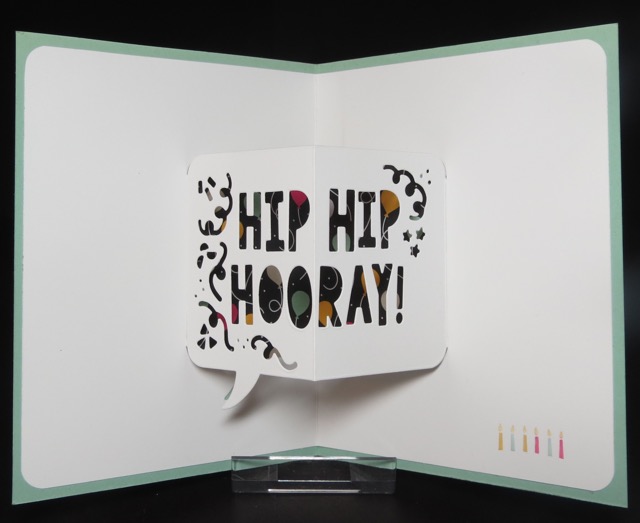
And the surprise inside:

As I was working on this card it seemed to be asking for just one more…..one more……one more accessory to make it scream “I’m fun!” Just the Hip Hip Hooray! Thinlit tells you it’s fun!
Product List
|
|
|
|
|
|
|
|
|
|
||
|
|
|
|
|
|
Here are a few tips for this card:
- Mint Macaron card stock: card base: 8-1/2″ x 11″, score at 4-1/4″ and fold in half
- Whisper White card stock (regular): 8-1/4″ x 5-1/4″, fold in half; scrap for label die
- Melon Mambo card stock: scrap for label die and punched balloons
- Crushed Curry and Sahara Sand: you just need scraps for punching a few balloons
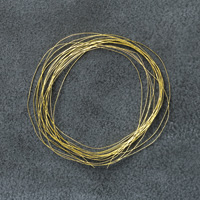
- Gold Metallic Thread: cut to 4″ pieces; attach to back of punch balloon pieces with Glue Dot
- Attach punched balloons to card front (and layered greeting piece) with Dimensionals
- Gather up Gold Metallic Threads as you would for any bouquet and secure with one or two Glue Dots. (This is the not so fun part>>>) After placing the greeting on the card front (with Dimensionals) add a Dimensional to the secured balloon bouquet, remove both protective layers, and slide in place under under the label. I use tweezers for this step.
- Designer Series Paper (DSP) pieces: 3-1/2″ x 4-1/2″ piece, folded in half; apply adhesive to one side and attach to inside of Mint Macaron card front, matching center fold lines. Apply adhesive to unattached side of DSP, fold over attached portion and then close card over that piece. This way it will not pull the card too tight. Also 1-1/2″ x 5-1/2″ piece for the card front.
- Stamp greeting using Melon Mambo Classic Ink on Whisper White card stock and then cut out with Lots of Labels Framelit.
- To die cut Hip Hip Hooray, lay die on crease of Whisper White 8-1/4″ x 5-1/4″ card stock. Be sure to line up the arrows of the die on the crease/fold. Ensure that you’ve left equal margins top and bottom.
- Use the Project Life Corner Rounder to round all four corners of this die cut layer. Attach the same as for the small piece of DSP that will now be lying under the ‘hip hip hooray’.
- Gently brush all balloons with the Clear Wink of Stella.
Gautier’s card is on the left. Do you think it’s an OK adaptation of the otherwise pretty pinkish card? I know he will be happy. He’s the son of the family I stayed with near Rouen, France while on my trip to Stampin’ Up!’s On Stage in Brussels in November.
By the way, if you purchased just the Party Wishes Stamp Set (I used the wood mount), $27 and the Party Pop-Up Thinlits Dies, $30, (total $57) you would earn a FREE Sale-a-Bration item of your choice. If you chose the clear mount Party Wishes Stamp Set, $19, you could add a pack of Glue Dots (total $54.25) to earn that FREE Sale-a-Bration item. Trust me, you’ll want the It’s My Party Designer Series Paper Stack too. There are 48 12″ x 12″ sheets, 4 each of twelve double sided designs.
Have fun with this card or your own adaptation the Hip Hip Hooray! Birthday card. It’s a fun one!


