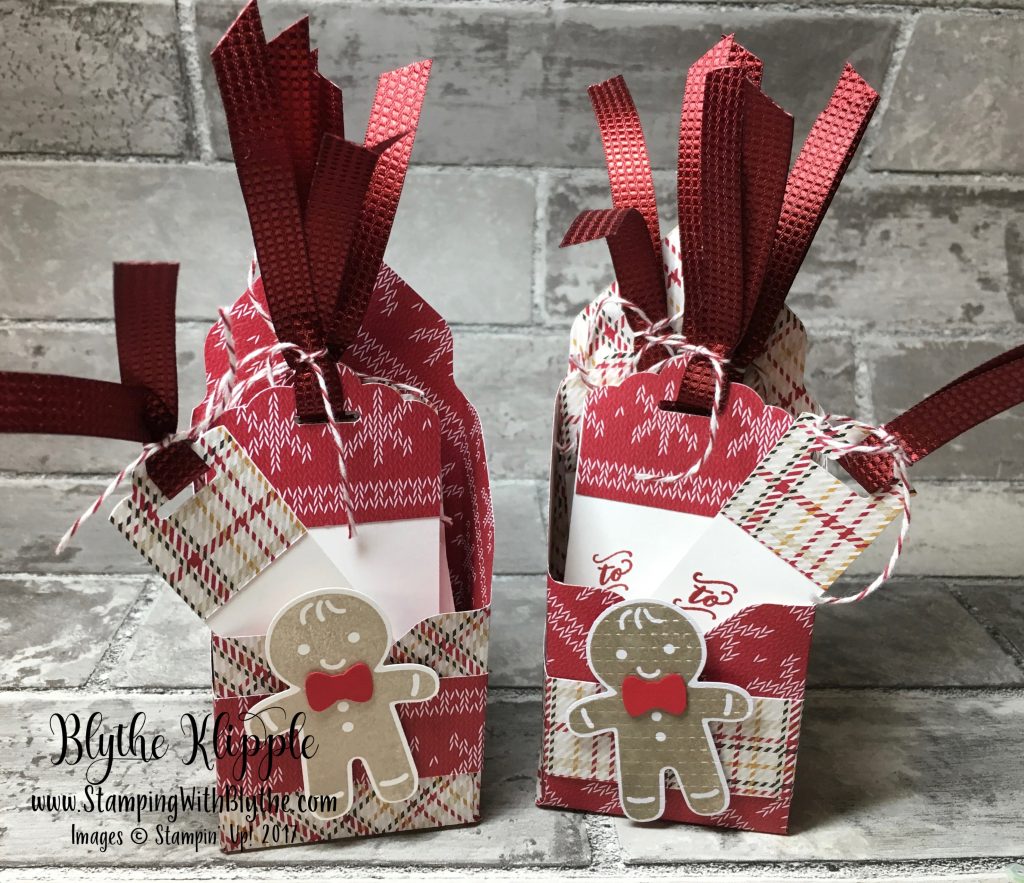
This past weekend three gals, Janet, Kelly and Christy, joined me in My Country Loft to make their Christmas cards, after which we moved on to some other fun projects, like today’s cute little gift tag box for giving to friends and other lucky recipients.
They’re EASY to make. You’ll need:
- 6″ x 6″ piece of Designer Series Paper or card stock
- Stampin’ Up!’s Envelope Punch Board
- Paper Trimmer
- Bone Folder
- Stapler
- Adhesive (Fast Fuse and Dimensionals)
- Stamps, ribbons, punches or Framelits/Thinlits
If you’re using a “directionally” patterned paper, place your paper with the positioning so that the “upsideright” of the images are at the top of the page (NORTH on a map) and start your cutting on the EAST edge, leaving the top (NORTH) edge un-punched.
Using the punch board, place that now famous east edge at the top of the board, lining it up at the 2″ mark. Punch and score. Slide over to the left to the 4″ mark and punch and score again. Rotate card stock to SOUTH, repeat. Rotate card stock to WEST and repeat again. Finally, along the NORTH edge, punch only at 2″ and 4″.

Round the four corners if desired.

The corner that is not scored will become the top of the box.
Holding the card stock as shown in the photo below, cut off that corner that is not scored.

On the side below (SOUTH) that cut off corner, snip along the vertical lines to create the flaps for the box.

Gently but firmed crease on all score lines. Add adhesive to one of the overlapping flaps at the front of the box and complete the box front. (photo below)

Attach the end of a 9″ piece of ribbon to the box front with a stapler, catching all layers of the card stock (including front flap) to secure. Staple so the flat side of the staple is inside the box. Wrap the ribbon around the box and staple again, to secure the end; then trim any excess.


TAGS:
Using an 8-1/2″ x 11″ piece of card stock (Whisper White), attach a 1″ to 1-1/2″ x 10″ piece of Designer Series Paper along the top long edge. Repeat for the long bottom edge, taking care, if the Designer Series Paper (DSP) has right/wrong or top/bottom pattern, to ensure that the top of the pattern is at the edge. Stick with me–you’ll soon see why. Cut the paper, across the width (longest side), at 4-1/4″; then cut each 4-1/4″ x 10″ piece just shy of 2″ wide so they’ll fit inside the mouth of the Scalloped Tag Topper Punch. You’ll have ten pieces to now cut into tags. And the design of the Designer Paper will be right side up rather than upside down.
Using the Scalloped Tag Topper punch, punch the top of each piece, punching right through the DSP layer. Then, using the Envelope Punch Board, slip each tag in the ‘reverse punch’ at the top of the board to corner round the bottom corners of each tag.

This project presents a great opportunity to use some 6″ x 6″ pieces of Stampin’ Up!’s great holiday 12″ x 12″ Designer Series Paper from the Annual Catalog or the Quilted Christmas 6″ x 6″ Designer Series Paper * from the Holiday Catalog. Don’t forget the elegant Year of Cheer specialty DSP * for an extra classy gift tag box. *These are last-chance items (they’ll retired along with the Holiday Catalog on January 2nd) and are available while supplies last. After January 2, 2018, they will no longer be available. Just click on any of the links in today’s post to go directly to my OnLine Store to purchase yours. Make a gift tag box for your child’s teacher/s, your neighbors, friends, grocery store clerks, hairdresser…..the list can go on and on.


I love this project! But what paper did you use on the gingerbread man tag set? I have seen these papers twice now, and cannot find them anywhere! Am I missing something? Thank you Barbara
Barbara, I thought (incorrectly) that I had stated that the gingerbread man boxes were made with last year’s 6″ x 6″ paper stack which I think is called Warmth & Cheer. My sister had brought it to my house and I used it for the first box (the one you see) I made. I think this year’s Quilted Christmas 6″ x 6″ Designer Series Paper Stack would work as a good substitute. Also, any 12″ x 12″ Designer Paper cut into 6″ x 6″ quarters would work well too. Just step away from the cute patterns (the one I used wasn’t actually a WOW to me until I finished it) you see and try a different paper. You’ll surprise yourself I think. I’m really sorry to have ‘teased’ you with a retired item. I usually don’t do that and will be careful to be sure to specify it if I do it again. ~Blythe
Thank you, Blythe. Funny thing is I saw ar sample from someone else with this paper, too! I’ll stop looking and choose something else. Not a problem, I just wanted to be sure I wasn’t losing my mind! Barbara