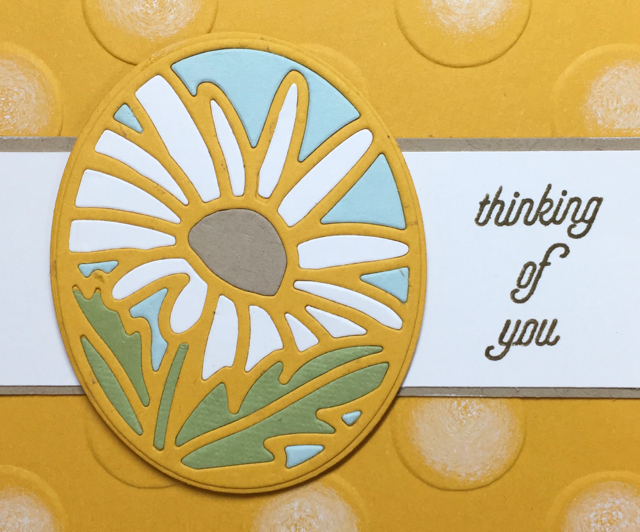
Learn a paper piecing technique made super easy using thinlits dies. People will wonder how you did it! Try this piecing technique using the That’s the Tag stamp set and it’s bundle-mate, the Timeless Tags Thinlits dies. These two items can be purchased as a bundle for a 10% savings. I had to have this bundle from the 2017 Occasions Catalog but haven’t yet used them prior to this fun card today. You’re going to be seeing some ideas for a few days using combinations of the stamps and dies, giving you lots of variety.
When I started this card it was my intention was that it would be used for my April Card Buffet but it proved to be a little too time consuming for the Buffet. Instead I’ll be sending it to a very special friend to remind her that she’s on my mind.
Although it looks pretty easy, in actuality you have to die cut a flower layer thinlit piece for each color. Obviously! I cut out the flower center (Crumb Cake) and the leaves (Pear Pizzazz) in one pass through the Big Shot. Then another pass was made using Whisper White for the flower petals and a final pass, Soft Sky, for the background areas surrounding the petals.
Another thing I learned: Carefully (like really carefully) remove each piece from the die as you’re ready to place it in the die cut outline. I used little tiny dots of Multipurpose Liquid Glue to attach the pieces of color into the proper places in the in the daisy die cut piece below.


It seemed to me that the background layer needed a pop of color in addition to the texture added by using the Large Polka Dot Textured Impressions Embossing Folder. So I used a Sponge Dauber to apply a soft circle of Craft Whisper White ink on each raised image. It looked a whole lot better with that addition.

Now it’s your turn. Try a paper piecing technique made super easy using this thinlits die. People will wonder how you did it!


