
I have to be honest and let you know that I was not wild about the large bloom in the Birthday Blooms stamp set when it first came out. Actually I wasn’t wild about it until we used it with a Clear Wink of Stella Glitter Brush used as you would an Aqua Painter at a private stamping gathering (Stampin’ Peddlars, Janet Baker) while in Salt Lake City before OnStage began in mid-April. I’ve love the greetings from first sight—so gentle. I like to take advantage of stamping with other groups when at an event so I can learn new techniques and styles.
But……..when we used the Wink of Stella Glitter Brush to color the large bloom I “saw the light” and was smitten.
It was really interesting to see how other people did their coloring. The dryer the brush, the darker the color.
I think the finished card is stunning and it’s actually quite easy.
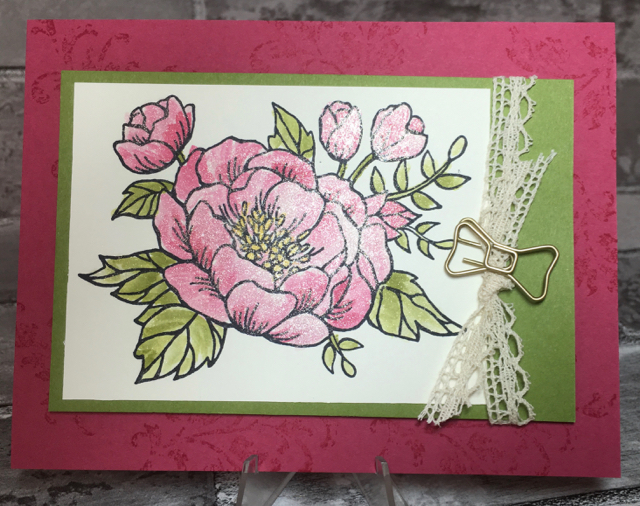
- Melon Mambo card stock: 8-1/2″ x 5-1/2″, scored at 4-1/4″ and folded in half; randomly stamp the blossom from Birthday Blooms using VersaMark Ink.
- Old Olive card stock: 5″ x 4″
- Whisper White or Shimmery White card stock: 3-3/4″ x 3″; stamp flower using Tuxedo Black Memento Ink
- Color in flower with Melon Mambo and Old Olive inks using the Wink of Stella brush and taking ink from the lid of the stamp pads. With a closed stamp pad, gently squeeze the lid into the pad to place a ‘puddle’ of ink in the lid (when opened). You can also place a few drops of Ink Refill into the open lid when needing more ink as in this project.
- Swipe the Wink of Stella brush on your Grid Paper (or scratch paper) until it shows clear (no color) when you’re ready to change colors.
- Layer the stamped and colored white card stock onto the Old Olive card stock, wrap and tie the Venetian Crochet Trim (or ribbon of your choice) and then adhere it onto the Melon Mambo card front.
Product List
|
|
||
|
|
|
|
|
|
|
|
|
|
|


Good news: the Birthday Blooms Stamp Set is in the 2016-2017 Annual Catalog so it’ll be available after the current catalog goes away on May 31st. If you don’t have your own demonstrator, I’d be glad to send you the new catalog next week. Just send me an email with your mailing and contact information.
And now, I have to get to this morning’s task……….. Not fun but the end result will be worth it.


