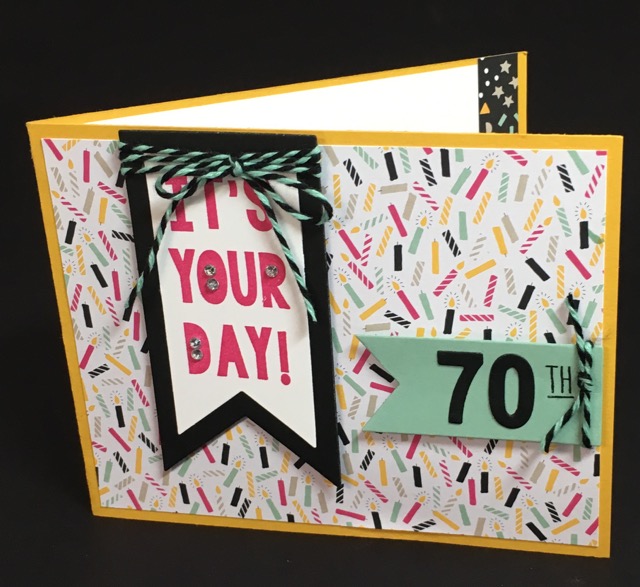
My niece is hosting a birthday bash in honor of her dad’s 70th birthday today. His birthday isn’t until February 4th but I needed the card for today’s event.


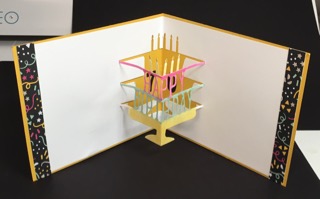
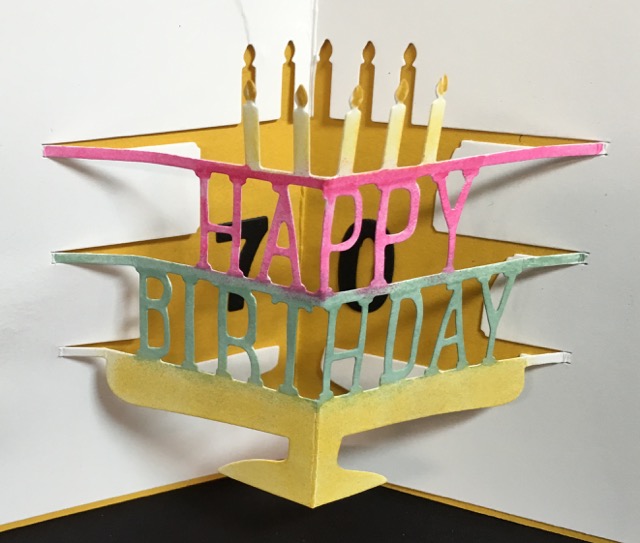
Although there are quite a few steps, none are complicated. Let’s start inside: after cutting out the Party Pop-Up Thinlit Die, I laid it down flat and colored it with markers based on the colors from the It’s My Party Designer Series Paper. Then I inserted in on the inside of the card.
TIP: Trim off at least 1/8″ from each end of the die cut pop-up, more if you want. Or trim the piece to be cut to 8-1/4″ or 8″ by 5-1/2″ before positioning the die and running it through the Big Shot.
TIP for placing a pop-up die inside a card: place adhesive on ONE SIDE of the pop-up die piece only. Lay it inside the card (on the proper side) and place the die fold right on the card front fold. Close card and secure that side of the pop-up. Then apply adhesive to the other side of the pop-up, fold it over it’s mate, as if the finished card is closed. THEN close the card front over the pop-up. It will place the pop-up into the proper position.
Product List
|
$6.50
|
||
|
$110.00
|
$27.00
|
$20.00
|
|
$30.00
|
$4.00
|
Have fun making your pop up birthday card. It’ll definitely make your recipient smile at the unexpected treat inside their card. Why not share your pop-up card with us. Send me an email, Blythe@StampingWithBlythe.com, with your photo attached. Be sure to include your full name and contact information.


