Stamping with folks at our community center is a great way to pass a few afternoon hours once or twice a month. We laugh. We create. We socialize. We meet new friends. And participants leave with two great cards to send to a friend. Wouldn’t you smile if you got a hand-stamped, personal greeting card in the mail rather than another advertisement or bill?
The Floral Squares Dies and the accompanying All Squared Stamp set have intrigued me since I first saw them. As is often the case, it did take me a long time to purchase the bundle (page 117 in the 2021-2022 Annual Catalog) and actually create some cards. I used them both in a monthly card swap I participated in and I decided to use that same (almost) card for one of our November Stamping at the Community Center cards.
My swap cards:

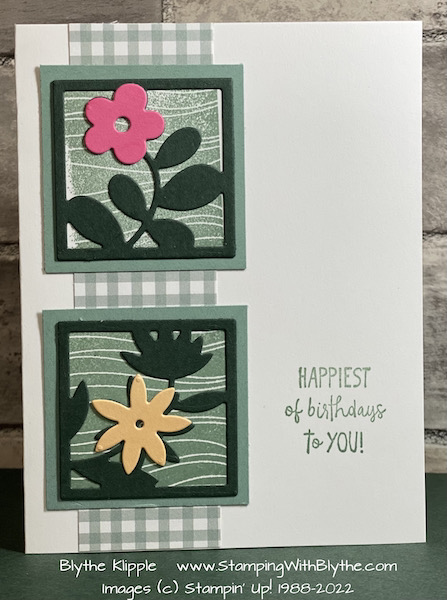
Our Community Center card for November 18th:

Product List
|
|
|
|
|
|
|
|
|
|
|
|
|
Tips:
- Basic White Thick card stock: 8-1/2″ x 5-1/2″, scored at 4-1/4″ and folded to create card base.
- Pansy Petals DSP (Designer Series Paper): 1-1/2″ x 5-1/2″
- attach to card base using Multipurpose Liquid Glue, aka ‘green glue’
- Soft Succulent card stock: 2-1/8″ square
- Basic White card stock: 2-1/2″ square –
- stamp with design of choice, Soft Succulent ink, trim to edge of stamped shape using Paper Snips
- attach to Soft Succulent layer
- Evening Evergreen card stock: 2″ x 2″ square
- die cut using Mini Cut & Emboss Machine and Floral Square Dies of your choice
- attach to previous layers using dots of ‘green glue’
- Fresh Freesia, Polished Pink, Pale Papaya card stock scraps
- die cut using Mini Cut & Emboss Machine and appropriate flower dies from Floral Squares Dies
- attach to die cut flowers using ‘green glue’
- Attach all layers to card front as shown in photo
- Stamp greeting of your choice using Soft Succulent Classic Ink

This is definitely a clean and simple birthday card that makes me smile. How about you?


