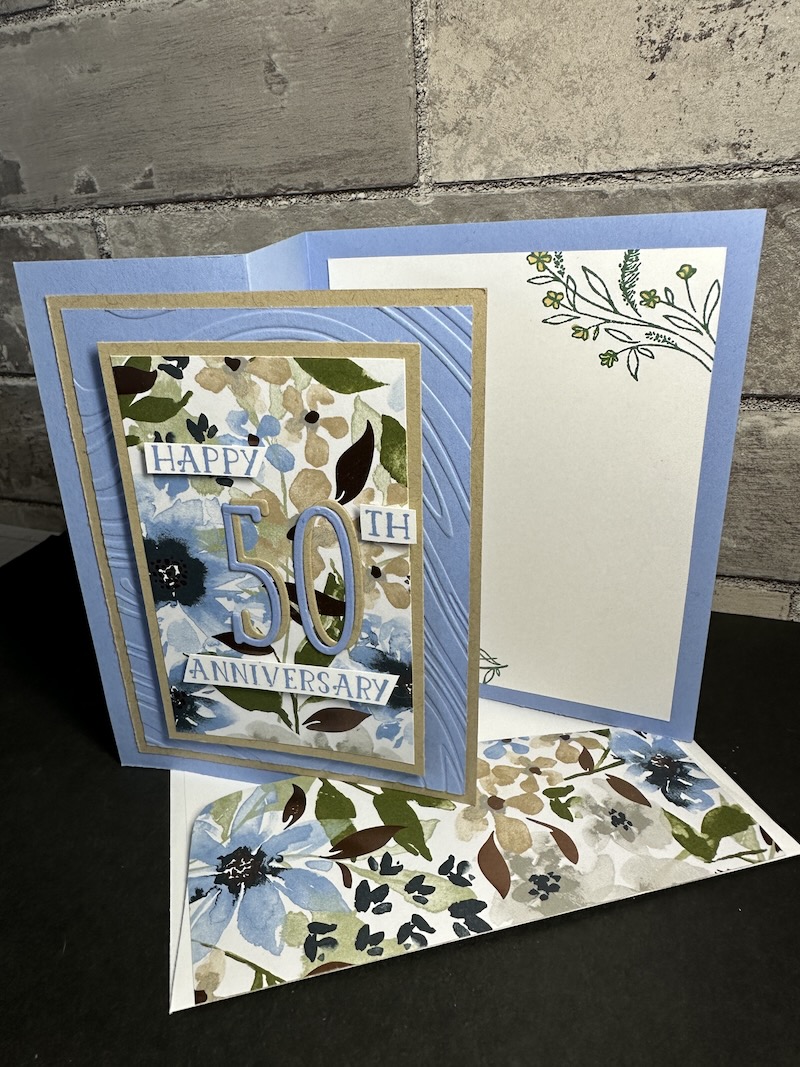
Yesterday was my baby’s birthday (she’s now the mom of three kidlets, the oldest almost 11 and the youngest 6-1/2) and I love the card I made for her. You might notice that I’m on a run with this screen/panel card. I’ll have another to share next week.
I started out by selecting the Birthday Bash Specialty Designer Series Paper* and then I chose the color of the card. I wanted it to be spring-y and fresh and bright. What makes this Designer Series Paper pattern ‘specialty’ is that there are gold foil bits of two of the designs. The Bermuda Bay layering color I choose because it was one of those used in the Birthday Bash grouping. I went for Tangelo Twist for my main card base.
 Be sure to check yesterday’s post for the layering panel dimensionals.


This card says what I wanted to convey: Hip Hip Hooray! It’s your special day! Additionally, we’ve had this little goofy little thing about “hashtags” since our December Christmas card weekend so the #HAPPY BIRTHDAY stamp was just the perfect little addition and it’s a part of the Balloon Bash stamp set.
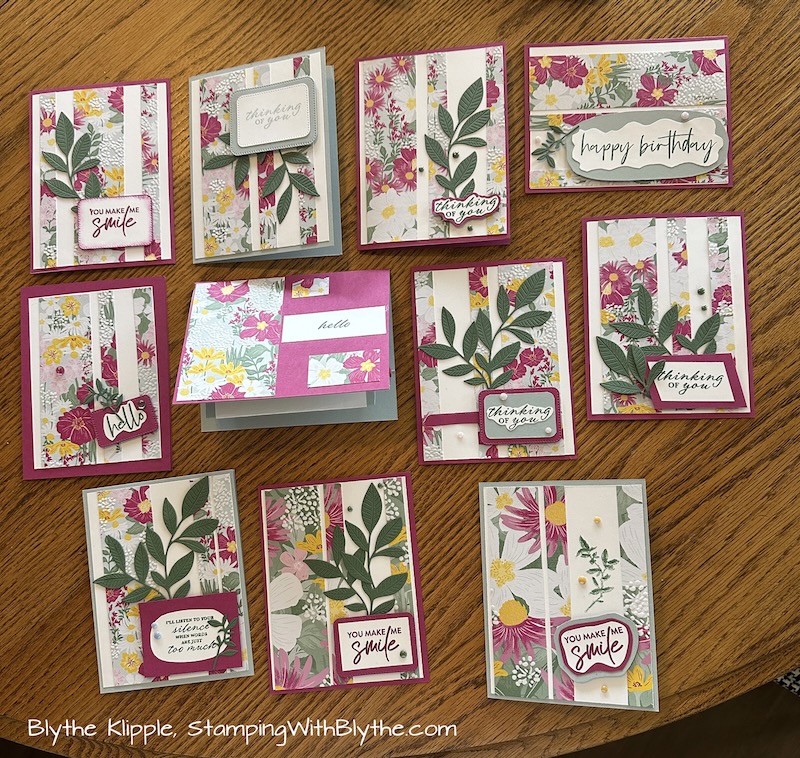
I will agree with you readers that I used a lot of ‘things’ but I wanted to make the card flash without going over the edge into tastelessness. Has that ever happened to you?
Panel 1 (right to left!): On Whisper White card stock, I stamped the frame with Bermuda Bay ink and the Happy Birthday to You with Tangelo Twist ink. Then I cut the stamped Whisper White card stock and Bermuda Bay card stock at the same time using the Chalk Talk Framelits and the Big Shot. Cut the Bermuda Bay piece in half horizontally and secure it to the back of the stamped piece with Snail or Fast Fuse Adhesive. Attach the die cut piece to the card layers with Dimensionals.
Panel 2: Ink up the ‘light ’em up!’ words with either a Bermuda Bay marker or Bermuda Bay stamp pad (carefully). Using markers, color in each of the candles, making sure to color the flames Crushed Curry with a touch of Tangelo Twist.
Panel 3: Using the Celebrate Today stamp set, stamp the balloon and using Crushed Curry ink, stamping off of the edge of the Whisper White card stock. Color the banner with markers, using the colors used in the Designer Series Paper pack. Add the ‘triangle tail’ using Tangelo Twist ink. Then add some Bermuda Bay Sequin Trim for extra bling. I added a bit of Tombow Multipurpose Liquid Glue to the ends of that trim so sequins wouldn’t fall off.
Panel 4: On top of the confetti sheet of Designer Series Paper, with Dimensionals, attach the two balloons that have been stamped on Whisper White cardstock and cut out using Paper Snips. Stamp the greeting on a scrap of Bermuda Bay card stock with either Memento or StazOn ink. Create the banner look using Paper Snips.
Using the 2-Way Glue Pen and Dazzling Diamonds Stampin’ Glitter, glitz up wherever you want. It’s a celebration!
* The Birthday Bash Specialty Designer Series Paper is only available until May 31, 2015 or supplies run out, whichever comes first. So………if you like it, I’d suggest you order yours soon so you’re not disappointed.
Thank you for stopping by and I’ll see you again tomorrow.