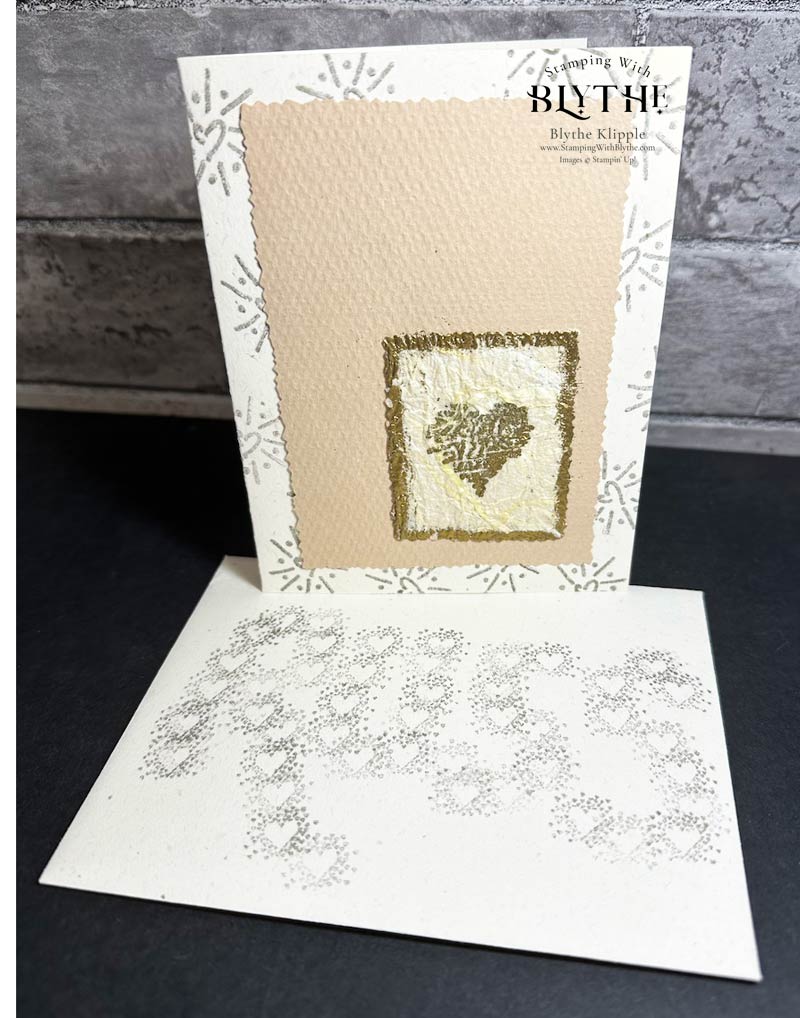
While emptying yet another box in our garage (we moved 3-1/2 years ago) my sweetie found this card I made for him around 1994/95. No date on it unfortunately. It was definitely before I became a Stampin’ Up! Demonstrator in 1996. Can you guess what Sweetie’s name is???

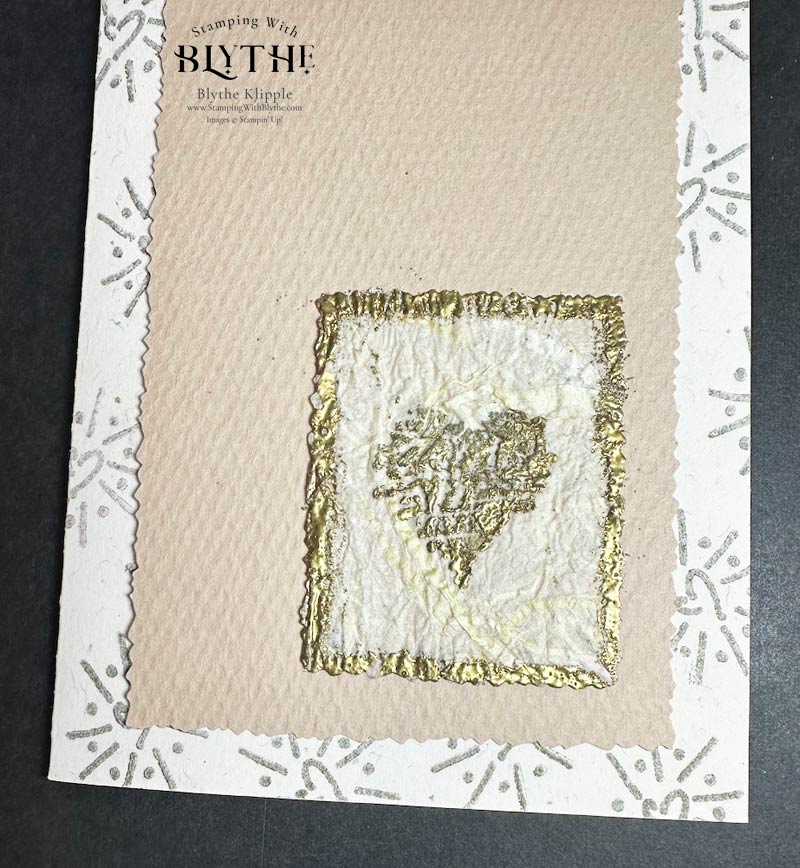
It was heat embossing that captivated me and got me hooked on stamping. I went to a crafting expo in my area (San Jose or San Mateo California at that time). And I think it was the JudiKins booth that was demonstrating heat embossing. What a WOW! Stamp an image. Sprinkle it with powder. Gently heat it till that powder melts and leaves a glossy or sparkly finish.. I was captivated and hooked. I’m not sure if I used tissue paper or exactly what for heat embossing the heart and border on this card.

What Process Did I Use?
Actually, I’m not totally sure.
- Base layer: I’m thinking I used a gold stamp pad. Woohoo. Sparkly gold ink! It also could have been heat embossed but I’m not sure since there are no raised areas.
- Tan layer: I had no clue about embossing machines way back then so I’m thinking this was pre-crinkled paper. I also didn’t have dies or thinlits or framelits for cutting that rectangle so I’m thinking I used a pair of deckle edged scissors. Pretty straight lines!
- Now to the embossed piece: The rectangle was also cut with deckle edged scissors. I really not sure how I stamped the edges so evenly but I’m sure I used either that Gold Ink or a pigment (stickier) based ink and then sprinkled it with Gold Embossing powder. The heart was also stamped with pigment ink and sprinkled with gold embossing powder. Then I heated it with a heat gun/embossing tool until the powder melted. Pretty neat job for a novice. I have no memory of what kind of adhesive I used in those days.
The Back of the Card!
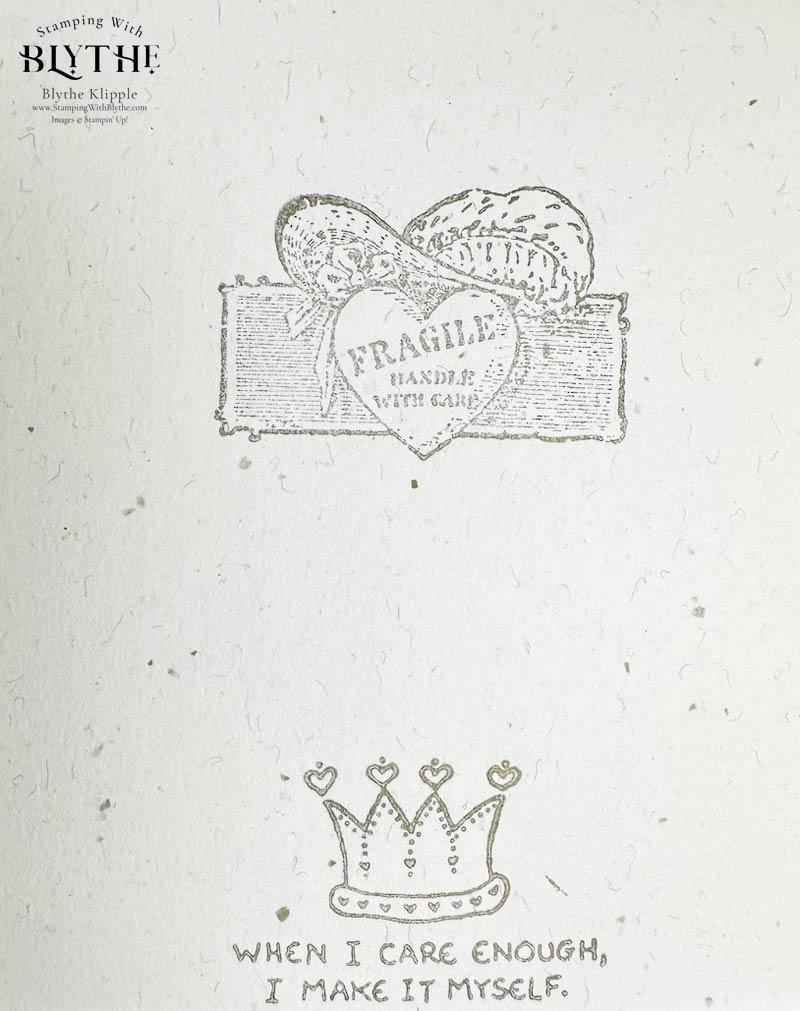
I obviously was aware, even as a novice stamper, to identify myself or state that the card was handmade by me on the back side. I even added a ‘fragile’ stamped image!

The ‘fragile/handle with care’ stamp is long gone but it was a fun, kind of saucy image to place on the back of this girlfriend to boyfriend card. The bottom image, WHEN I CARE ENOUGH, I MAKE IT MYSELF, I still have. The red rubber is rather hard but it still works. It was made by Inkadinkado, Boston MA and cost $5.95. I still use this stamp frequently when I’m in a special silly mood or my recipient will ‘get it’.
Now to the Envelope!
Obviously I had a teeny tiny 1/2″ square heart stamp which I used over and over again to spell out Russ’s name!
None of today’s products are made my Stampin’ Up! They were all individual stamps that I purchased here and there when I saw them and thought they were so cute. I had LOTS of individual stamps but……..they didn’t really coordinate with each other. I had a Dick-Tracy-like stamp…..A man standing in front of a microphone (still have this one.)…..All the continents. The infamous “Russ” even made me an awesome case, roughly 6′ x 4′, with shelves, that hung on the wall in our hallway, holding all of my individual stamps. Sadly it and 98% of those stamps are now long gone. But I’ve more than ‘replaced’ them with Stampin’ Up! stamps which are far more versatile.
I was invited to a ‘workshop’ in April 1996, across the street from our house. It was a Stampin’ Up! workshop. What? What’s Stampin’ Up!? The stamps came in coordinated sets that could be used to create a story of some sort.. And there was coordinated card stock and ink pads and markers! Oh my! I was in heaven. I signed up as a demonstrator the next day and, 27 years later, the rest is history. My first purchased stamp set was called Clowning’ Around — a clown who could do cartwheels plus ten more pieces.

So What are the Benefits of Being a Stampin’ Up! Demonstrator?
Where to start?!
You can purchase your stamps and other products at a discount is number 1. As a hobbiest you can purchase stamps and supplies at a discount. 2. You get sneak peaks at new products. 3. You get to see the new catalog at least a month before the rest of the ‘world’. 4. You make lots of new friends.
Or…..You can develop a team of demonstrators who may or may not sell to others. You can do it your way! Your only obligation is to sell a minimum of $300 in product every quarter. That can be to yourself (not hard to achieve) or to others. As team members you can also enjoy the camaraderie of our group plus the support and inspiration you receive from other team members and me. Whether you sell to others or buy for yourself, I offer support and friendship to all of the demonstrators in my team.
Well, enough said for today. I hadn’t planned on wandering off into the world of being a demonstrator but I know I’m so glad I sort of fell into it twenty-seven years ago. It’s allowed me to meet so many awesome, fun people here in Idaho when I became brave enough to offer classes at our local community center. It’s grown from there and I wouldn’t give it up for anything!
Thank you so much for popping in today. Please leave a comment below if you’re looking for a specific project or technique. And don’t forget to make a card and then make someone’s day by sending it to them.


