SUPPLIES:
Stamps:
Sprinkles of Life (photopolymer – 139971)
Layered Letters Alphabet (photopolymer – 138692)
Ink:
Bermuda Bay Stampin’ Write Marker from the BRIGHTS COLLECTION set (131259)
Bermuda Bay Pad (131171)
Crushed Curry Pad (131173)
Cucumber Crush Pad (138324)
Tip Top Taupe Pad (138325)
Watermelon Wonder Pad (138323)
Paper: (including cutting dimensions):
Whisper White Card stock (100730) 8-1/4” x 8-1/4”, 2” x 8”, 1/4” x 3”
Bermuda Bay (131197) 2-1/8” x 2-1/8”
Crumb Cake (120953) 8-1/2” x 8-1/2”
Crushed Curry (131199) 2-1/8” x 2-1/8”
Cucumber Crush (138335) 2-1/8” x 2-1/8”
Watermelon Wonder (138334) 2-1/8” x 2-1/8”
Tools:
Tree Builder Punch (138295)
SNAIL Adhesive (104332)
Liquid Multipurpose Glue (110755)
Stampin’ Dimensionals (104430)
Paper Snips (103579)
Accessories:
Aqua Painter (103954)
Blender Pen (102845)
Cherry On Top Washi Tape (138384) 9”
Dazzling Details (124117)
INSTRUCTIONS:
1. Using the Aqua Painter and the four ink pads: press down on the pad lid, while pad is closed, to transfer ink onto the top of the lid. Use that ink to load up the wet tip of your Aqua Painter.
2. Holding your Aqua Painter sort of on its side, spread the color around in thick long sections measuring about 1-1/2″ x 3/4”. This will create the base for your stamped words. Remember to swipe your Aqua Painter off on a towel until is is clear to clean the tip before loading up a new color.
3. Load up more color and liquid onto the Aqua Painter to create the splatter colors on the open white space of the page. Repeat this for each color as you create the water color strips.
4. Once the water colored areas are done, give them time to dry before stamping words.
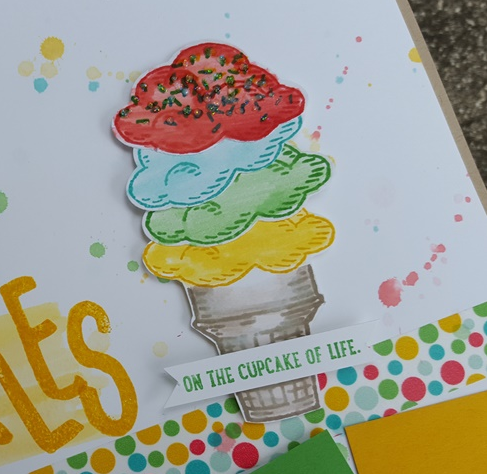
5. Use the smaller Whisper White piece to create your ice cream pieces: stamp the cone in Tip Top Taupe and the ice cream in the other four colors.
6. Use Blender Pen and the ink on the lids to color in the ice creams a lighter shade of the stamped colors.
7. Use the Cucumber Crush ink pad to stamp the “sprinkles” onto the top ice cream shape.
8. Using the Tree Builder Punch, punch out the ice creams and hand cut the cone with Paper Snips.
9. Adhere the ice creams to one another, stacking them vertically and then attach them to the cone using Dimensionals.
10. Stamp the smaller sentiment onto a thin Whisper White strip using the Bermuda Bay marker to ink up half of the sentiment.
11. Use Paper Snips to cut little flags at either end of the sentiment and secure it with Dimensionals to the cone.
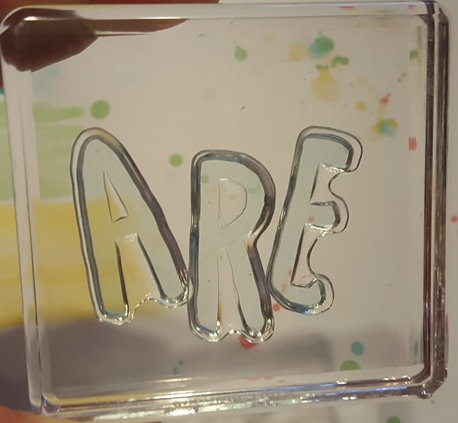
12. To stamp the large words arrange the letters onto one block (as shown in photo) and ink up using the full strength ink of the same color water color strip on the page.

13. Apply the Washi tape along the bottom section of the page below the water color stripes. Wrap the ends of the tape onto the back of the Whisper White page.
14. Use Multipurpose Glue to secure the wrinkled (from the water coloring) Whisper White page onto the crumb cake mat piece. Place a heavy object on the two pages once attached and let set for a few minutes. This will help the page flatten out.
15. Now secure the square colored card stock photo mats to the bottom section of the page using both SNAIL and Dimensionals.
16. Use Dimensionals to secure the completed ice cream cone to the page and you are ready to attach your awesome photos!
If you have any questions or want to order the products used for this project CONTACT ME today! Blythe@StampingWithBlythe.com or phone: 209-352-1059. I would be more than happy to help you out!


