Using Your Stamparatus for the First Time

Using your Stamparatus for the first time requires a bit of thought.  In fact, I’ve put it off for over a month.  Don’t do that.  It’s not that hard!

Check this video out first:  (If the video doesn’t appear [because I can’t see it in my preview], please click here.)


TIP:  A very important thing to do before you attempt to stamp anything is to put some Washi Tape around each magnet!  If you don’t, you’ll wish you had.  Feel free to ask me how I know!

Using Your Stamparatus for the First Time
BE SURE to place some Washi Tape around each magnet for easier manipulation.  Take about a 4″ piece of Washi, lay the magnet on top of it and pinch the two ends together, creating a “handle”.


Following are the steps I used for the card I shared with you yesterday, the Country Home thank you card.

Using Your Stamparatus for the First Time
Country Home Thank You card


Using Your Stamparatus for the First Time
Position the FOAM MAT in the corner of the Stamparatus platform.  The four images that I’ll be using are set on the plastic plate just for a visual.


Before adding your card stock, position your images on various plates, setting them up so they’ll be perfect for making your final card.  I cut pieces of scrap paper to the size of my card and placed them, one by one, onto the Stamparatus.  It will take several tries to get them just where they belong.

Using Your Stamparatus for the First Time
Secure your card stock with both magnets. DO NOT LET THEM TOUCH EACH OTHER!


Using your stamparatus for the first time
Position the floral arrangement and the ‘hello’ images, unlinked, in their places around the milk can; flip plate to put them in place, ink them up and then lay ink plate/images onto the card stock.


Using your stamparatus for the first time
Lift the plate, ink the image, and lower the plate to stamp it.


Using the Stamparatus for the first time
Don’t they look great!?


Using the Stamparatus for the first time
Stamped image


Using Your Stamparatus for the First Time
Position the “label’ on the reverse side of the plate that holds the milk can.


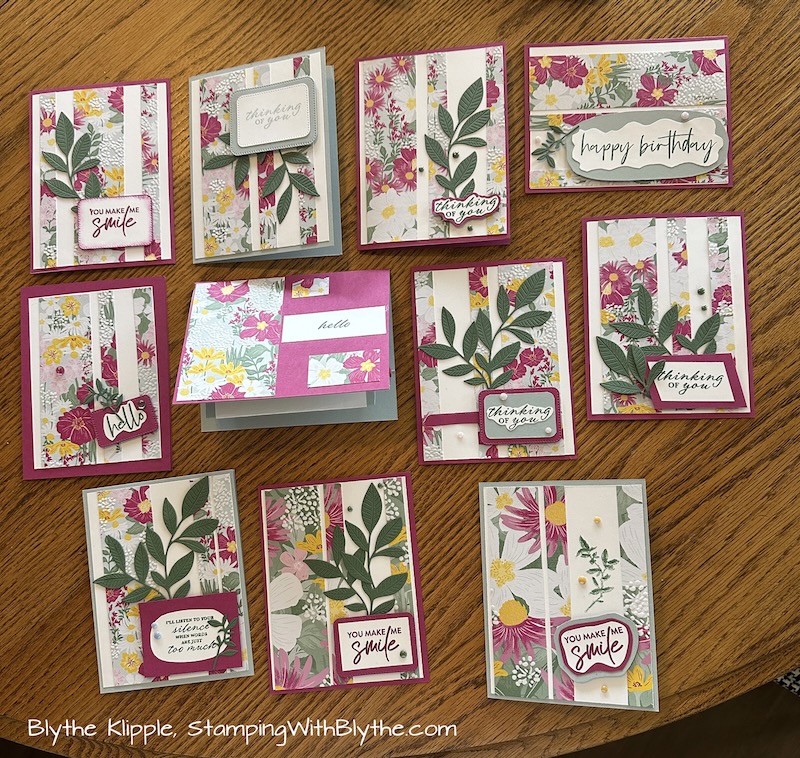
And again, here’s the finished card:

Using Your Stamparatus for the First Time
Country Home Thank You card.  I used an Aqua Painter and Coastal Cabana ink to ‘scribble’ the shadow below the milk can.


Have you noticed that I don’t fill in every bit of space inside the lines of an image when using the Stampin’ Blends?  This intentional white space is visible on the artichoke, the pink (or green) petals, the brown stems, the milk pail and the ‘metal’ tag.


I hope this gives you at least a hint of how to set up your Stamparatus to achieve a wonderful final card.  Setting your images on this or that side of the clear plate is the most challenging part but then follows the fun!  Using your Stamparatus for the first time is a learning experience but oh so worth it.


Leave a Comment

Your email address will not be published. Required fields are marked *

ENTER YOUR EMAIL TO SUBSCRIBE
to receive updates and subscriber-only offers!

Scroll to Top